Table of Content
If you cannot fit them in line with the couch, place them slightly behind the viewer and angle them towards the couch. They should always be 2 feet or more above the viewer, pointing downward. This is where you'll place a soundbar if applicable to you.
And remember volume will now be adjusted by the remote for the external device or by a knob if there is one. Press Enter, scroll down to External Speaker, and press Enter. With this step you're also turning off your TV's internal speaker since you won't be using it. And the other end into an ARC HDMI port on your sound unit. Connect one end of the AUX-in audio out port of your TV. Top 4 Solutions to Play DVD on Xbox 360 When you wanna to enjoy DVD with Xbox 360, you can learn the 4 methods to help you.
What is a digital to analog audio RCA converter?
The THX Home Theater Tune-Up App provides an easy way to check your initial TV or video projector picture settings and make sure the speakers are connected correctly. Another option that you have is to look into smart options that are paired wirelessly, or you can even seek out an option to pair the devices via Bluetooth with a Bluetooth receiver. But, this option will require additional steps, so we will take a look at that further later on. The enhanced sound quality will transform your media streaming world, and you will only want to continue adding multiple channels to your home theater’s surround sound speaker system. To connect your Soundbar to a TV and DVD player, first, connect the DVD player to your TV via an HDMI cable.

Robert Silva has extensive experience in consumer electronics and home theater product sales and sales supervision; he has written about audio, video, and home theater topics since 1998. Robert has articles published on HBO.com and Dishinfo.com plus has made appearances on the YouTube series Home Theater Geeks. While the specifications might vary based on the type of TV and DVD player that you have, there should be some general guidelines that you can follow. Soundbars are simple to set up, are sleek in appearance, and are relatively user-friendly.
How to Hook up a DVD Player to TV With/Without HDMI
It is not necessary that only a 5 plugs wire will work. In both cases, they’re essentially a Bluetooth speaker system that’s designed to be fairly simple to connect. They’re usually a stereo speaker pair but some also include additional speakers for good bass sound, too. However, if you’re not using a receiver but instead an amplifier, you’ll likely need a digital to analog converter box to do the same. How to connect home theater speakers to your TVwithouta receiver.

Yes, you can connect an old DVD player to a new TV as long as your DVD player and TV have either HDMI ports or audio and video ports. Some old DVD players have both so you shouldn't have any problem hooking it up with your new TV. Now that you have paired your Soundbar to your TV and DVD Player via a wired or a wireless connection, it is time to begin streaming your audio. You might notice that your DVD Player’s audio sounds a bit different than when you use other streaming sources.
Factors To Look For When Buying The RCA Cables
Always make sure that your TV is off and unplugged when changing inputs for your items. Explore our complete collection of LG electronics, mobile devices, appliances and home entertainment solutions -- and find everything you need to connes and family, no matter where they are. You now have an audio setup that's as impressive as your new TV. Then Connect the DVD with the TV via optical cable.

After you have established which type of connections your TV and DVD Player have for Input and Output of both audio and video, it is time to establish the connection. Typically, you can do this with an HDMI cable connected from your DVD player to the TV. Nonetheless, if you do not want a lot of cables lying around on your floor, you may want to go with this method.
If you have a cable device, satellite receiver, or streaming device you may be able to get a surround sound audio signal from those. To do so you’ll need to connect the digital or HDMI audio outputs to your receiver’s input as needed using an HDMI cable. Actually, composite cables (A/V cables) have ends that are red, white and yellow. Red and white are for the audio connections and yellow for the video connection. HDMI resembles a longer and thinner USB cord, and only one cord of HDMI can for both video and audio.
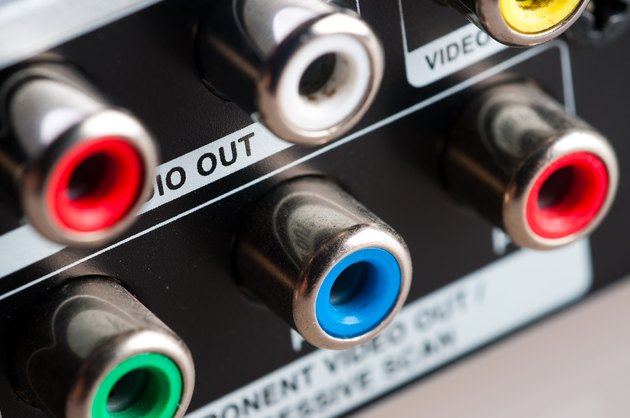
Connect the video three plugs to the output ports of the media source. Plug each one into its corresponding colored-coded ports. Digital to analog converters accept a digital signal that can’t be used with powered speakers or an amplifier and convert the digital signal to a stereo audio signal. They provide standard RCA jack outputs and also a 3.5mm (1/8″ headphone) jack in some cases.
This helps you create realistic surround sound. First, connect the audio/video output of the box directly to the TV. Then connect it to your home theater receiver, and route the signal to your TV. This guide provides some basic guidelines for setting up a home theater system. The extent, combinations, and connection options vary depending on how many and what types of components you have, as well as the room size, shape, lighting, and acoustic properties. DVD players do not display output on a channel like some VCRs.

I'm an IT person by trade, but love entertainment like movies and video games. I've been messing around with home theater packages since my Dad's old, expensive custom Bose Lifestyle set up in the mid-90s. Stick around to see fun technical projects and new stuff I'm learning about home theaters. Make use of the receiver as a bridge for audio to the speakers.
As you can see, home theater receivers do a lot of things that will automatically make your home theater system work more efficiently and make your home viewing experience more enjoyable. Now let us talk about why you would want to have a home theater receiver at all. You can follow the guide in the above parts of this article for both of the connection processes. The connection for the 5.1 and 7.1 surround system is completed here.

No comments:
Post a Comment